Install Apache2 for Linux Server

Install Apache2 for Linux Server
TO install LAMP stack (Linux, Apache2, MySQL, PHP) and phpMyAdmin on your Linux system using a Text User Interface (TUI) tool called tasksel. tasksel is a Debian-based tool (used in Ubuntu and other Debian-based distributions) that allows you to install predefined groups of packages like LAMP with just a few simple commands.

Here’s how you can do it using tasksel for the full LAMP stack setup:
Steps to Install LAMP Stack Using tasksel:
1. Update Package List

First, update your package list to ensure you have the latest packages:

sudo apt update

2. Install tasksel

Install tasksel if it’s not already installed:

sudo apt install tasksel

3. Install LAMP Stack Using tasksel

To install the LAMP stack, simply use tasksel:

sudo tasksel install lamp-server

This command will install:

  •     Apache2 (web server)
  •     MySQL (database server)
  •     PHP (for dynamic content)
  •     Additional PHP modules needed to integrate with Apache and MySQL

After the installation, Apache2, MySQL, and PHP will be installed and configured.
4. Install phpMyAdmin Using tasksel

If you also want to install phpMyAdmin, you can use tasksel for that as well:

sudo tasksel install phpmyadmin

This command installs phpMyAdmin, which is a web-based interface to manage MySQL databases.
5. Check the Installation

Once the installation is complete, you can check if everything is set up:

    Apache: Open your web browser and visit http://localhost/. You should see the Apache2 default page.

    phpMyAdmin: Visit http://localhost/phpmyadmin/ in your browser. If everything is set up, you should see the phpMyAdmin login page. Log in with the MySQL root user or any other MySQL user you created during installation.

6. Restart Apache2

In case Apache2 or other services are not running automatically, you can restart Apache2 and MySQL manually:

sudo systemctl restart apache2
sudo systemctl restart mysql

7. Configure Firewall (Optional)

If you have a firewall enabled, allow HTTP and HTTPS traffic:

sudo ufw allow in "Apache Full"

8. Clean Up (Optional)

After confirming everything works, remove any unnecessary files or temporary configurations. For example, remove info.php file (if you created it to test PHP):

sudo rm /var/www/html/info.php
 
10. Now install mysql
To install all mysql file you need to write where * install all required files.
 
sudo apt install libapache2-mod-php php-mysql php-cli php-common php-json php-zip php-gd php-mbstring php-xml php-curl
 
sudo apt install mysql*
 
Now you have mysql installed on your computer and you can login it with your root password and for phpmyadmin you need to create a username and set password so for this operation you need to put following command.
 
sudo mysql -u root -p
 
SET GLOBAL validate_password.policy=0;
 
SET GLOBAL validate_password.length=6;
 
CREATE USER 'ksumanadhikari'@'localhost' IDENTIFIED BY 'welcome';
 
GRANT ALL PRIVILEGES ON *.* TO 'ksumanadhikari'@'localhost' WITH GRANT OPTION;
FLUSH PRIVILEGES;


Activate Window

PowerShell is a powerful scripting language and command-line shell developed by Microsoft. One of its most fascinating capabilities is its ability to execute commands and scripts from remote URLs. A frequently used shorthand for downloading and executing a script in PowerShell is:

 $    irm https://get.activated.win | iex

Understanding the Command

  1. irm
    irm is short for Invoke-RestMethod, a cmdlet in PowerShell used to send HTTP or HTTPS requests to a web server and process the response. In this context, it fetches the script or data hosted at the provided URL (https://get.activated.win).

  2. https://get.activated.win
    This URL points to the location of the script or resource to be downloaded. When you run the command, PowerShell fetches the content hosted here.

  3. | iex
    The | symbol is a pipeline operator in PowerShell. It takes the output from the irm command and passes it to iex.
    iex stands for Invoke-Expression, which evaluates or runs the code it receives as input.

    In this case, the script fetched from https://get.activated.win is executed immediately by PowerShell.


Purpose of the Command

This command is commonly used for:

  • Bootstrap Installers: Installing tools or software by fetching and executing an installer script directly from a URL.
  • Custom Scripts: Running automation scripts hosted online.
  • Quick Deployments: Setting up configurations or environments on remote machines with minimal input.

Security Implications

While the command is extremely convenient, it also comes with significant security risks. Downloading and executing code directly from the internet without verifying its contents can lead to:

  • Malware Infections: Malicious actors may host harmful scripts under seemingly legitimate URLs.
  • Unauthorized Access: Scripts could install backdoors or steal sensitive information.
  • System Compromise: A poorly written script might unintentionally break critical system components.

How to Use the Command Safely

  1. Verify the Source
    Ensure that the URL (https://get.activated.win in this case) is legitimate and comes from a trusted source.

  2. Inspect the Script
    Instead of executing the command directly, download the script first and inspect its contents. You can do this by running:

    irm https://get.activated.win > script.ps1
    notepad script.ps1
  3. Run with Limited Permissions
    Execute scripts in a controlled environment, such as a virtual machine or a sandbox, to mitigate risks.

  4. Avoid as a Habit
    Use this approach sparingly. Prefer fetching scripts, inspecting them, and executing only those you trust.


Conclusion

The $irm https://get.activated.win | iex command showcases the power of PowerShell to interact with web resources seamlessly. However, this convenience demands responsibility. Always be cautious about where your scripts come from and what they do. By following best practices, you can leverage this command safely and efficiently.

Do you often use this command or similar ones? Share your experiences or tips in the comments below!

Architecture identifiers

While Choosing the distro you need to select some architecture then. You need to know about it. These are architecture identifiers that specify the type of CPU architecture and instruction set used by a system. Each corresponds to a different hardware or processor family. Here's a brief explanation of each:

1. amd64

  • Architecture: 64-bit x86
  • Description: Designed for 64-bit processors, initially developed by AMD, but also used by Intel.
  • Usage: Most modern PCs and servers.

2. arm64

  • Architecture: 64-bit ARM
  • Description: Refers to 64-bit ARM processors (also known as AArch64).
  • Usage: Modern ARM-based devices like smartphones, tablets, and some servers (e.g., Apple M1/M2 chips).

3. armel

  • Architecture: ARM (32-bit, little-endian, soft float)
  • Description: Used for older or embedded ARM systems, supporting software floating-point operations.
  • Usage: Embedded devices or legacy ARM platforms.

4. armhf

  • Architecture: ARM (32-bit, hard float)
  • Description: Supports hardware floating-point operations.
  • Usage: Raspberry Pi and other ARM-based systems.

5. i386

  • Architecture: 32-bit x86
  • Description: Refers to 32-bit Intel processors starting with the 80386 (introduced in 1985).
  • Usage: Older PCs and systems still running 32-bit operating systems.

6. mips64el

  • Architecture: 64-bit MIPS, little-endian
  • Description: A 64-bit version of the MIPS architecture in little-endian byte order.
  • Usage: Network devices, embedded systems, or specialized hardware.

7. mipsel

  • Architecture: 32-bit MIPS, little-endian
  • Description: A 32-bit version of the MIPS architecture in little-endian byte order.
  • Usage: Older embedded systems and routers.

8. ppc64el

  • Architecture: 64-bit PowerPC, little-endian
  • Description: A version of the PowerPC architecture for 64-bit systems in little-endian byte order.
  • Usage: IBM POWER servers.

9. s390x

  • Architecture: IBM z/Architecture (64-bit)
  • Description: A 64-bit architecture used by IBM mainframes.
  • Usage: Enterprise and high-performance computing environments.

Summary Table:

IdentifierArchitectureKey Use Case
amd6464-bit x86Most PCs and servers
arm6464-bit ARMModern ARM-based devices
armel32-bit ARMOlder/embedded ARM systems (soft float)
armhf32-bit ARMRaspberry Pi and newer ARM systems (hard float)
i38632-bit x86Older PCs and systems
mips64el64-bit MIPSSpecialized network/embedded devices (little-endian)
mipsel32-bit MIPSEmbedded systems (little-endian)
ppc64el64-bit PowerPCIBM POWER servers
s390x64-bit IBMMainframe computing

FTP Error!

FTP Error!

 Status: Connecting to 192.168.XX.XX:XX... Status: Connection attempt failed with "ECONNREFUSED - Connection refused by server". Error: Could not connect to server Status: Waiting to retry... Status: Connecting to 192.168.XX.XX:XX... Status: Connection attempt failed with "ECONNREFUSED - Connection refused by server". Error: Could not connect to server

If this problem is faced then just type command

$    sudo ufw allow 21


Text-based User Interface (TUI) commands in Linu

Text-based User Interface (TUI) commands in Linux allow for a graphical-like interface within the terminal, enabling users to interact more visually without needing a full GUI environment. Here are some popular TUI commands and tools in Linux:


System Monitoring and Management

1. htop - An enhanced version of top, showing CPU, memory, and process usage with interactive controls.

        $ htop

2. glances - A comprehensive system monitoring tool that displays CPU, memory, network, and disk usage.

        $ glances

3. nmon - A performance monitor that shows CPU, memory, disk, network, and more.

        $ nmon

File Management

1. mc (Midnight Commander) - A powerful file manager that allows navigation, copying, moving, and editing files.

        $ mc

2. ranger - A file manager with VI keybindings and previews of images and text files.

        $ ranger

3. vifm - A file manager with VI-like keybindings for navigating and managing files.

        $ vifm

Text Editors

1. vim - A highly configurable text editor with TUI, known for its power in text editing.

        $ vim filename

2. nano - A simple and user-friendly text editor for editing text files.

        $ nano filename

3. emacs -nw - Emacs in "no-window" mode runs a powerful editor within the terminal.

        $ emacs -nw filename

Disk and Filesystem Utilities

1. ncdu - Disk usage analyzer, providing a tree-view of disk space usage.

        $ ncdu

2. cfdisk - A partition manager that allows creating and managing partitions.

        $ sudo cfdisk

3. fdisk - A TUI for managing disk partitions.

        $ sudo fdisk /dev/sdX

Network Monitoring and Management

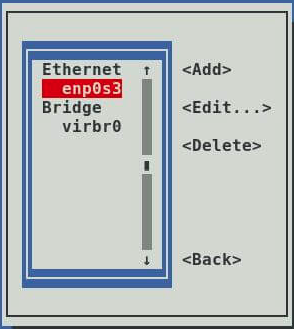
1. nmtui - A TUI for managing network connections.

        $ nmtui

2. bmon - A network bandwidth monitor for real-time bandwidth usage visualization.

        $ bmon

3. nload - Displays incoming and outgoing network traffic in real time.

        $ nload

System Utilities

1. alsamixer - A sound mixer for configuring audio levels.

        $ alsamixer

2. iwconfig - Configures wireless network interfaces.

        $ iwconfig

3. iftop - Displays real-time bandwidth usage per IP.

        $ sudo iftop

Package Management

1. aptitude - A package manager with a TUI interface for browsing and managing packages (Debian/Ubuntu).

        $ sudo aptitude

System Configuration

1. tldr - Simplified man pages in a readable format.

        $ tldr command

2. whiptail - A dialog box for creating prompts and menus within scripts.

        $ whiptail --title "Example" --msgbox "Hello!" 10 30

Each of these commands offers a powerful way to manage various aspects of your system from the terminal with an intuitive, interactive interface. You can install these packages through your system’s package manager if they’re not already installed.


Microsoft Core fonts on linux

 Hello Everyone!

When ever you use linux and need to run some windows software then basically i may ask for microsoft core fonts. You can use it on your Linux with couple of lines of codes. These codes installs the microsoft fonts install in your computer so that you can use your software and your document without any format change.


Use these codes:

sudo apt update
sudo apt install ttf-mscorefonts-installer

To use these code you can select one by one or you can just select all and paste it in terminal.