Showing posts with label Linux. Show all posts

Architecture identifiers

While Choosing the distro you need to select some architecture then. You need to know about it. These are architecture identifiers that specify the type of CPU architecture and instruction set used by a system. Each corresponds to a different hardware or processor family. Here's a brief explanation of each:

1. amd64

  • Architecture: 64-bit x86
  • Description: Designed for 64-bit processors, initially developed by AMD, but also used by Intel.
  • Usage: Most modern PCs and servers.

2. arm64

  • Architecture: 64-bit ARM
  • Description: Refers to 64-bit ARM processors (also known as AArch64).
  • Usage: Modern ARM-based devices like smartphones, tablets, and some servers (e.g., Apple M1/M2 chips).

3. armel

  • Architecture: ARM (32-bit, little-endian, soft float)
  • Description: Used for older or embedded ARM systems, supporting software floating-point operations.
  • Usage: Embedded devices or legacy ARM platforms.

4. armhf

  • Architecture: ARM (32-bit, hard float)
  • Description: Supports hardware floating-point operations.
  • Usage: Raspberry Pi and other ARM-based systems.

5. i386

  • Architecture: 32-bit x86
  • Description: Refers to 32-bit Intel processors starting with the 80386 (introduced in 1985).
  • Usage: Older PCs and systems still running 32-bit operating systems.

6. mips64el

  • Architecture: 64-bit MIPS, little-endian
  • Description: A 64-bit version of the MIPS architecture in little-endian byte order.
  • Usage: Network devices, embedded systems, or specialized hardware.

7. mipsel

  • Architecture: 32-bit MIPS, little-endian
  • Description: A 32-bit version of the MIPS architecture in little-endian byte order.
  • Usage: Older embedded systems and routers.

8. ppc64el

  • Architecture: 64-bit PowerPC, little-endian
  • Description: A version of the PowerPC architecture for 64-bit systems in little-endian byte order.
  • Usage: IBM POWER servers.

9. s390x

  • Architecture: IBM z/Architecture (64-bit)
  • Description: A 64-bit architecture used by IBM mainframes.
  • Usage: Enterprise and high-performance computing environments.

Summary Table:

IdentifierArchitectureKey Use Case
amd6464-bit x86Most PCs and servers
arm6464-bit ARMModern ARM-based devices
armel32-bit ARMOlder/embedded ARM systems (soft float)
armhf32-bit ARMRaspberry Pi and newer ARM systems (hard float)
i38632-bit x86Older PCs and systems
mips64el64-bit MIPSSpecialized network/embedded devices (little-endian)
mipsel32-bit MIPSEmbedded systems (little-endian)
ppc64el64-bit PowerPCIBM POWER servers
s390x64-bit IBMMainframe computing

FTP Error!

FTP Error!

 Status: Connecting to 192.168.XX.XX:XX... Status: Connection attempt failed with "ECONNREFUSED - Connection refused by server". Error: Could not connect to server Status: Waiting to retry... Status: Connecting to 192.168.XX.XX:XX... Status: Connection attempt failed with "ECONNREFUSED - Connection refused by server". Error: Could not connect to server

If this problem is faced then just type command

$    sudo ufw allow 21


Text-based User Interface (TUI) commands in Linu

Text-based User Interface (TUI) commands in Linux allow for a graphical-like interface within the terminal, enabling users to interact more visually without needing a full GUI environment. Here are some popular TUI commands and tools in Linux:


System Monitoring and Management

1. htop - An enhanced version of top, showing CPU, memory, and process usage with interactive controls.

        $ htop

2. glances - A comprehensive system monitoring tool that displays CPU, memory, network, and disk usage.

        $ glances

3. nmon - A performance monitor that shows CPU, memory, disk, network, and more.

        $ nmon

File Management

1. mc (Midnight Commander) - A powerful file manager that allows navigation, copying, moving, and editing files.

        $ mc

2. ranger - A file manager with VI keybindings and previews of images and text files.

        $ ranger

3. vifm - A file manager with VI-like keybindings for navigating and managing files.

        $ vifm

Text Editors

1. vim - A highly configurable text editor with TUI, known for its power in text editing.

        $ vim filename

2. nano - A simple and user-friendly text editor for editing text files.

        $ nano filename

3. emacs -nw - Emacs in "no-window" mode runs a powerful editor within the terminal.

        $ emacs -nw filename

Disk and Filesystem Utilities

1. ncdu - Disk usage analyzer, providing a tree-view of disk space usage.

        $ ncdu

2. cfdisk - A partition manager that allows creating and managing partitions.

        $ sudo cfdisk

3. fdisk - A TUI for managing disk partitions.

        $ sudo fdisk /dev/sdX

Network Monitoring and Management

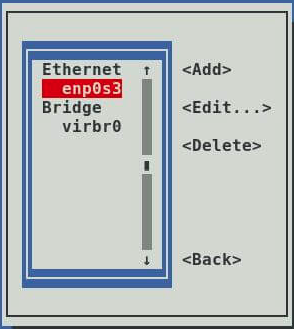
1. nmtui - A TUI for managing network connections.

        $ nmtui

2. bmon - A network bandwidth monitor for real-time bandwidth usage visualization.

        $ bmon

3. nload - Displays incoming and outgoing network traffic in real time.

        $ nload

System Utilities

1. alsamixer - A sound mixer for configuring audio levels.

        $ alsamixer

2. iwconfig - Configures wireless network interfaces.

        $ iwconfig

3. iftop - Displays real-time bandwidth usage per IP.

        $ sudo iftop

Package Management

1. aptitude - A package manager with a TUI interface for browsing and managing packages (Debian/Ubuntu).

        $ sudo aptitude

System Configuration

1. tldr - Simplified man pages in a readable format.

        $ tldr command

2. whiptail - A dialog box for creating prompts and menus within scripts.

        $ whiptail --title "Example" --msgbox "Hello!" 10 30

Each of these commands offers a powerful way to manage various aspects of your system from the terminal with an intuitive, interactive interface. You can install these packages through your system’s package manager if they’re not already installed.


Microsoft Core fonts on linux

 Hello Everyone!

When ever you use linux and need to run some windows software then basically i may ask for microsoft core fonts. You can use it on your Linux with couple of lines of codes. These codes installs the microsoft fonts install in your computer so that you can use your software and your document without any format change.


Use these codes:

sudo apt update
sudo apt install ttf-mscorefonts-installer

To use these code you can select one by one or you can just select all and paste it in terminal.

Linux Hardware Command

Linux Hardware Command

Command Name

Command

Function

uname

$ uname -a

The uname command displays basic information about your system, includeing the operating system name, kernel version, and processor architecture.


lsblk

$ lsblk


The lsblk command lists all the available block devices on your system, including hard drives, SSDs, and USB drives. This will display a list of all the available block devices on your system.


lspci

$ lspci


The lspci command displays information about all the PCI buses and devices connected to your system. This command can be helpful if you need to determine which devices are installed on your system.


lsusb

$ lsusb


The lsusb command displays information about all the USB buses and devices connected to your system. This command can be helpful if you need to determine which USB devices are installed on your system.


Df

$ df -h


The df command displays information about the disk space usage on your system. This command can be helpful if you need to determine how much free space is available on your hard drive.


Free


$ free -h


The free command displays information about the system's memory usage. This command can be helpful if you need to determine how much free memory is available on your system.


Top

$ top


The top command displays information about the system's processes, including their CPU and memory usage. This command can be helpful if you need to determine which processes are using the most resources on your system.


Htop

$ htop


The htop command is similar to the top command, but it provides a more user-friendly interface with colored output and the ability to sort processes by various criteria.


Dmesg

$ dmesg


This will display the system's boot messages, including any errors or warnings that occurred during the boot process.


lsmod


$ lsmod


This will display a list of all the kernel modules currently loaded on your system.


lshw

$ sudo lshw


This will display detailed information about the hardware on your system.


Hwinfo


$ sudo hwinfo


The hwinfo command is similar to the lshw command, but it provides even more detailed information about the hardware on your system.

lsdev

$ lsdev


The lsdev command displays information about all the devices on your system, including disks, tapes, CD-ROMs, printers, and serial ports.


Ifconfig


$ ifconfig


The ifconfig command displays information about your network interfaces, including their IP addresses, netmasks, and MAC addresses. This command can be helpful if you need to troubleshoot network issues or simply to learn more about your network configuration.


Iwconfig

$ iwconfig


The iwconfig command displays information about your wireless network interfaces, including their SSIDs, signal strengths, and encryption settings. This command can be helpful if you need to troubleshoot wireless network issues or simply to learn more about your wireless network configuration. To use the iwconfig command, simply open a terminal window and type −


Uptime

$ uptime


The uptime command displays information about how long your system has been running, along with its average load. This command can be helpful if you need to determine how long your system has been running or to troubleshoot performance issues.

lsmod


$ lsmod


The lsmod command displays information about the kernel modules currently loaded on your system. This command can be helpful if you need to determine which modules are loaded or to troubleshoot issues related to kernel modules.

lspcmcia

$ lspcmcia


The lspcmcia command displays information about all the PCMCIA devices connected to your system. This command can be helpful if you need to determine which PCMCIA devices are installed on your system. To use the lspcmcia command, simply open a terminal window and type −


dmidecode

$ sudo dmidecode --type 17


This will display a list of all the PCMCIA devices connected to your system.


Install TomCat in Linuxmint

Apache Tomcat (called "Tomcat" for short) is a free and open-source implementation of the Jakarta Servlet, Jakarta Expression Language, and WebSocket technologies.[2] It provides a "pure Java" HTTP web server environment in which Java code can also run. Thus it is a Java web application server, although not a full JEE application server.

Tomcat is developed and maintained by an open community of developers under the auspices of the Apache Software Foundation, released under the Apache License 2.0 license. 


To install Apache Tomcat on Linux Mint, you can follow these steps:

  1. Open a Terminal: You can open the Terminal in Linux Mint by pressing Ctrl+Alt+T or by searching for it in the application menu.

  2. Update the Package List: It's always a good practice to update the package list to ensure you're installing the latest available version. Run the following command:

    bash
    sudo apt update
  3. Install OpenJDK: Apache Tomcat requires Java to run. You can install OpenJDK, which is an open-source implementation of Java, using the following command:

    bash
    sudo apt install default-jdk
  4. Download Apache Tomcat:

    • Visit the Apache Tomcat download page at https://tomcat.apache.org/download-90.cgi (replace "90" with the version you want to download).
    • Under "Binary Distributions," download the latest version of "Core" for your preferred format (usually a .tar.gz file).
  5. Extract Tomcat: Navigate to the directory where you downloaded the Tomcat archive file (e.g., ~/Downloads) and use the following command to extract it:

    bash
    tar -zxvf apache-tomcat-9.x.x.tar.gz

    Replace apache-tomcat-9.x.x.tar.gz with the actual file name you downloaded.

  6. Move Tomcat to a Preferred Location: You can move the extracted Tomcat directory to a location of your choice. For example, you can move it to /opt:

    bash
    sudo mv apache-tomcat-9.x.x /opt/tomcat
  7. Create a Symbolic Link: To easily manage Tomcat, create a symbolic link to the Tomcat directory. This step is optional but can be convenient:

    bash
    sudo ln -s /opt/tomcat /usr/local/tomcat
  8. Configure Environment Variables: To ensure that Tomcat can find the Java installation, you need to set the JAVA_HOME environment variable. Edit the catalina.sh script to set this variable:

    bash
    sudo nano /opt/tomcat/bin/catalina.sh

    Add the following line near the top of the file, just after #!/bin/sh:

    bash
    export JAVA_HOME=/usr/lib/jvm/default-java

    Save the file and exit the text editor.

  9. Start Tomcat: You can now start Apache Tomcat using the following command:

    bash
    /opt/tomcat/bin/startup.sh
  10. Access the Tomcat Manager: Open a web browser and go to http://localhost:8080 to access the Tomcat Manager. You should see the Tomcat homepage.

That's it! You've successfully installed Apache Tomcat on your Linux Mint system. You can now deploy web applications to Tomcat and manage it using the Tomcat Manager web interface.


If Apache Tomcat is prompting for a username and password when you try to access the Tomcat Manager, you need to configure user authentication. By default, Tomcat requires authentication to access the Manager application for security reasons. To configure user authentication, follow these steps:

  1. Create a User: Open a terminal and navigate to the tomcat directory:

    bash
    cd /opt/tomcat

    Then, open the conf/tomcat-users.xml file for editing:

    bash
    sudo nano conf/tomcat-users.xml

    Add a user with the necessary roles (e.g., manager-gui, admin-gui) to this file. Below is an example of a user with both roles:

    xml
    <tomcat-users> <user username="admin" password="your_password" roles="manager-gui,admin-gui"/> </tomcat-users>

    Replace "admin" with your desired username and "your_password" with your desired password.

    Save the file and exit the text editor.

  2. Restart Tomcat: After adding the user, you need to restart Tomcat for the changes to take effect:

    bash
    /opt/tomcat/bin/shutdown.sh /opt/tomcat/bin/startup.sh
  3. Access the Manager Again: Open a web browser and go to http://localhost:8080 or http://localhost:8080/manager (for the Manager app specifically). When prompted for a username and password, enter the credentials you configured in the tomcat-users.xml file.

You should now be able to access the Tomcat Manager using the provided username and password.

Remember to choose a strong password and keep your credentials secure, as they control access to the Tomcat Manager, which can perform administrative tasks on your Tomcat server.